Microphone for screen recording: pick the right one in Chrome
A screen recording with a sharp picture and muddy sound is hard to sit through. Choosing a microphone for screen recording is mostly about two things: knowing which microphone Chrome is really listening to, and whether that one suits the room you are in. This guide shows how to read Cheap Recorder's Microphone tile, which kind of microphone fits which recording, the Bluetooth trap on a Mac, and a 30-second test that catches a wrong choice before it costs you a whole take.
What the Microphone tile tells you
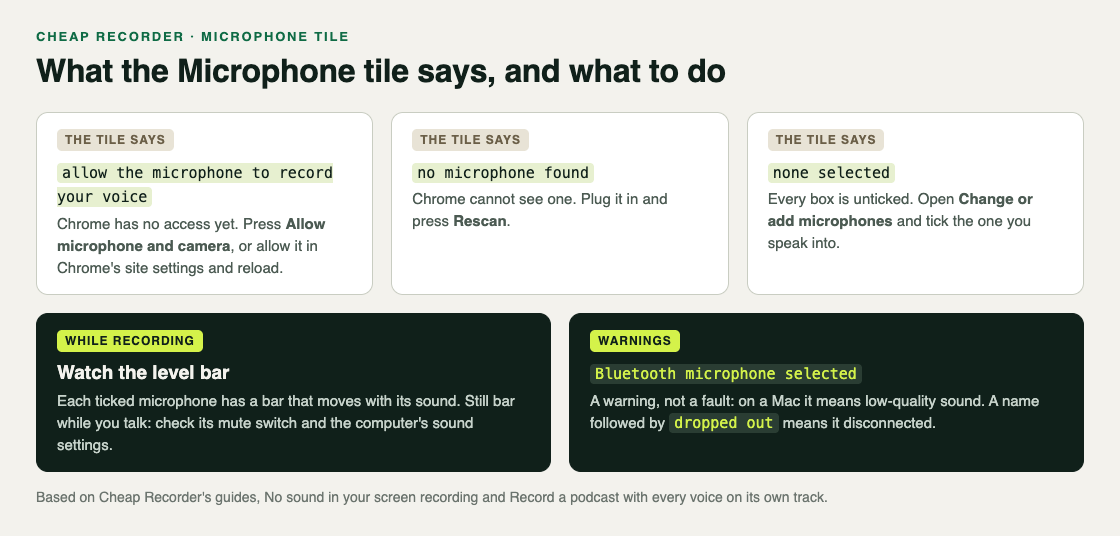
In Cheap Recorder, your voice comes from the microphones ticked in the Microphone tile. The tile has a short line of text that tells you its state, and each state has one fix:
- allow the microphone to record your voice: Chrome has not been given access yet. Press Allow microphone and camera. If you blocked it earlier, allow the microphone again in Chrome's site settings for the page, then reload.
- no microphone found: Chrome cannot see one. Plug it in and press Rescan.
- none selected: every box is unticked. Open Change or add microphones and tick one.
Open Change or add microphones even when the tile looks fine. A webcam, a monitor and a headset can each have their own microphone, and the one ticked may not be the one you speak into. Each microphone in the list shows wired or bluetooth beside its name, which helps when two names look alike. Tick the right one and the recorder remembers your choice in this browser.
Which microphone for screen recording, by situation
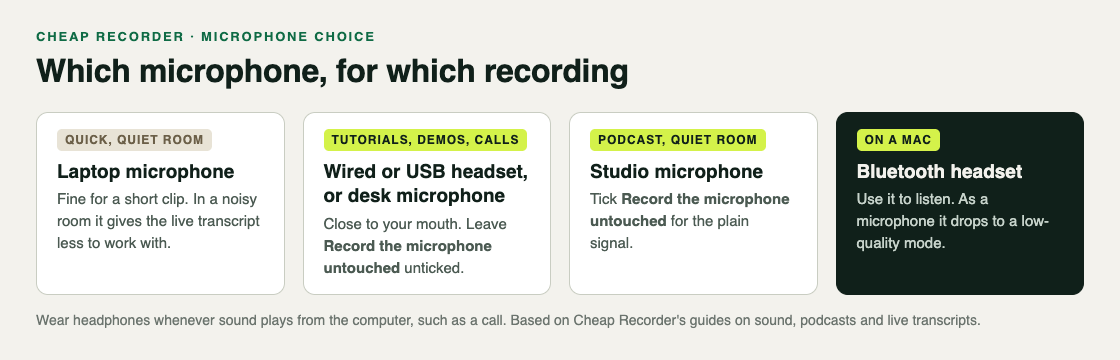
There is no single right answer. The right microphone depends on where you record and who is talking, so match it to the job:
- The laptop's built-in microphone. Fine for a quick clip in a quiet room. It sits far from your mouth, so in a noisy room it picks up the room as much as you.
- A wired or USB headset, or a desk microphone. The safe choice for tutorials, demos and calls. It also helps the live transcript: the transcript is made from what Chrome hears on your microphone, so a headset or a desk microphone close to your mouth beats a laptop's built-in one in a noisy room.
- A studio microphone in a quiet room. Good for a podcast or a course. Pair it with Record the microphone untouched, covered below.
- A Bluetooth headset. Fine for listening. On a Mac, do not use it as your microphone.
Whatever you pick, wear headphones whenever sound plays from the computer, such as the other side of a call. A microphone near a speaker hears that sound again, and that is how echo gets into a recording. If you rely on the transcript, the post on captions and a transcript while you record explains how it works.
The Bluetooth headset trap on a Mac
On a Mac, a Bluetooth headset used as a microphone switches into a low-quality mode. It still records, but your voice sounds thin, and so does whatever you hear through the headset while it is in that mode.
Cheap Recorder shows Bluetooth microphone selected when you tick one. That is a warning, not a fault. The fix is simple: keep the headset on to listen, and tick a wired or USB microphone for your voice.
A Bluetooth link, or a loose USB cable, can also drop during a take. If a microphone's name is followed by dropped out, it disconnected and its sound ends at that point. Reconnect it and record that part again.
Record the microphone untouched, or not
The recorder normally cleans up your microphone: it corrects echo, noise and volume. Under Options, Record the microphone untouched turns all three off and gives you the plain signal.
- Leave it unticked for laptop microphones, a noisy room, and every call. If it is ticked during a call, the echo correction is off and the other side can echo back into your recording.
- Tick it for a studio microphone in a quiet room. If your voice comes out very quiet, or pumps up and down, the volume correction is the usual cause, and the untouched signal fixes it.
If you are not sure, leave it unticked. The default suits most people recording at a desk.
A worked example: a 30-second microphone test
Say you are about to record a 20-minute tutorial with a new USB microphone, and your webcam has a microphone of its own. Before the real take, run this test. It takes about a minute and works on the Free plan.
- Open Cheap Recorder in Chrome, press Choose folder... and pick a folder for today's session.
- Open Change or add microphones. You see the webcam's microphone and the USB one. Untick the webcam's and tick the USB microphone. If it is not in the list, plug it in and press Rescan.
- Switch off Record my webcam and do not pick a screen. The recorder then saves a sound-only M4A file, which is the quickest way to hear your microphone on its own.
- Name the recording Mic test and press Start recording. Talk at your normal volume for 30 seconds, then type a few words. Watch the level bar next to the USB microphone: it should move when you speak.
- Press Stop and finish and listen in the player on the page. Is your voice clear? Is the keyboard louder than you? If so, move the microphone closer to your mouth and test again.
- When it sounds right, switch the webcam back on, pick your screen, rename the recording and record the real thing.
If the level bar stays still while you talk, check the microphone's own mute switch and your computer's sound settings. The no sound guide on cheaprecorder.com lists every check in order, and the post on a screen recording with no sound helps you work out which sound is missing.
More than one person, more than one microphone
For two or more people in one room, give each person their own microphone, all plugged into the same computer, and tick them all. Wired or USB microphones work best, and everyone should wear headphones. Each ticked microphone gets its own level bar, so check that every bar moves when its person speaks.
If you tick Also save every source separately under Options, each microphone is also saved as its own file, named after the microphone and starting with audio_. Microphones with clearly different names are easier to tell apart in the folder. Sit a little apart, because microphones in one room hear each other faintly. Some plans limit how many microphones you can record at once, and the start bar tells you if you tick too many. The post on recording a podcast with separate tracks covers this setup in full.
Frequently asked questions
Which microphone does Cheap Recorder record?
The ones ticked under Change or add microphones in the Microphone tile. The recorder remembers your choice in this browser, so check it again when you plug in something new.
Can I use a Bluetooth headset as my microphone?
On a Mac it drops into a low-quality mode when used as a microphone. Use it to listen, and a wired or USB microphone for your voice.
Does the microphone change the transcript?
Yes. The live transcript is made from what Chrome hears on your microphone, so a headset or desk microphone close to your mouth gives it more to work with than a laptop's built-in one in a noisy room.
Should I tick Record the microphone untouched?
Only for a studio microphone in a quiet room. Leave it unticked for calls and laptop microphones, so echo, noise and volume correction stay on.
Get started
The free plan needs no card and includes 12 hours of recording a month with the live transcript. Try Cheap Recorder in Chrome, run the 30-second test, and your recordings stay on your own disk.
Comments
No comments yet.
Sign in or make an account to comment.