Design review video for teammates in other time zones
A design review video lets you walk through a design once and let every teammate watch it when their day starts. No one stays up for a call, and nobody gets a thin summary instead of the real thing. This post shows how to record one in Chrome with Cheap Recorder, how to ask for feedback so people reply with something useful, and how to read the replies the next morning.
Why a recording works better than a late call
A live review needs everyone awake at the same time. With teammates spread across time zones, someone always joins at a bad hour or misses it.
A recording gives reviewers things a call does not. They can pause on a screen, replay a step and read the transcript while they think. They answer when they have looked properly, not when they were put on the spot.
The cost is that you cannot read the room. A reviewer in another time zone cannot interrupt you, so the recording has to answer their questions before they ask. The rest of this post is about that.
If you already send recorded updates, the habits carry over. Our post on a weekly team update video covers the routine, and the one on a sprint review demo for a teammate who missed it is close to this one. What is different here is that the reader's answer is the point.
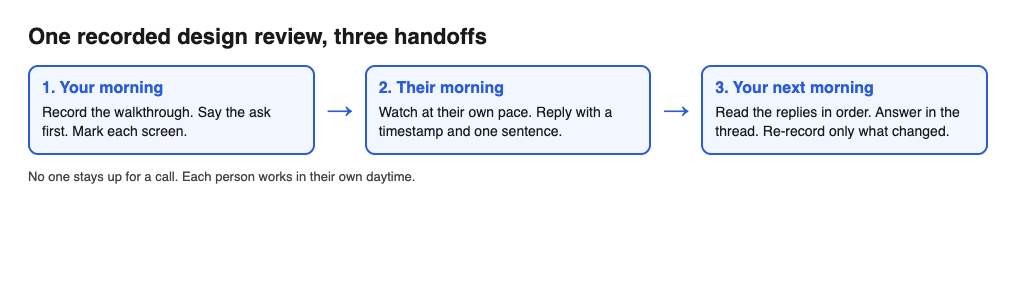
The review is a relay: you record, they reply in their own daytime, you read the replies next morning.
Before you record
Ten minutes of setup saves a second take.
- Write your questions first. Three or four specific questions beat "thoughts?". For example: "Is the order of the checkout steps clear? Does the error after a failed card make sense? Ignore colours for now."
- Put the design in one browser tab or one window. Sharing one window or one browser tab instead of the whole screen keeps other tabs, apps and private things out of the recording.
- Close what you do not need. Whatever is on the shared screen ends up in the file.
- Use a headset or a desk microphone close to your mouth. The transcript is made from what Chrome hears on your microphone, so it beats a laptop's built-in one in a noisy room.
Record a design review video in Chrome
Cheap Recorder runs in Google Chrome on macOS, Windows and Linux, and the free plan covers everything in this list.
- Choose a folder. Under Where to save, press Choose folder... and allow Chrome to edit files there. Until you do, Start recording stays greyed out and the note beside it says to choose a folder first.
- Name the recording. Type a name in Name this recording, such as
Checkout review 01. The name is used for the file and its folder, and numbering keeps takes in order. - Pick what to capture. Under What to capture choose A browser tab or A window, then pick it in Chrome's sharing box.
- Add your face if you like. Switch on Record my webcam. The default layout is Picture in picture, bottom right. Drag the camera where it covers nothing, and use the Size slider (12% to 50% of the picture's width) to shrink it. Choose Screen only in the Layout menu for a clean screen.
- Check the transcript language. Live transcript is ticked by default under Options. Chrome listens for one language per recording, and the menu goes back to its default each time the page opens, so check it before every take.
- Record a 30-second test and play it back. It catches a wrong microphone or a muted tab before you have talked for ten minutes.
- Press Start recording. When the note beside the button reads ready to record, you can begin.
- Finish with Stop and finish. Do not use Chrome's own Stop sharing bar; that also ends the recording, but Stop and finish is the route the recorder expects.
The recording is written to your folder about once a second, so a long walkthrough does not fill your computer's memory. You get an MP4 and, if the transcript heard speech, a plain-text transcript with the time of each line. Our guide to screen and webcam recording goes deeper on layouts.
Order the walkthrough around the reply you want
A simple order works for most reviews:
- The ask, in the first 30 seconds. "This is the new checkout flow. I need feedback on the order of the steps and the error states."
- The context, in one minute. The problem, who it is for, what you tried before.
- The design, in the order a user meets it. One screen at a time, saying what the user is trying to do.
- The decisions, out loud. When you reach something you are unsure about, say "this is the part I want you to look at".
- The ask again, with a date. What you need, by when, and where to reply.
Press M, or Add marker, at the start of each part. A short note confirms the time. Markers are not added while you are typing in a text box. They are written to files only when Also save every source separately is ticked (open Options before you start); with the default single MP4 the notes show while you record but are not saved. If you leave that option off, write down the times as you go.
Two habits help reviewers who cannot ask you anything. Name what you point at ("the secondary button in the footer", not "this"), and name the state you are showing ("the empty state", "the error after a failed card"). Their written feedback will then say which screen and which state it is about.
A worked example: a checkout review across three time zones
You are in Manila and your teammates are in Berlin and Austin. It is 3:00 pm for you.
- You record "Checkout review 01" in one tab, with markers at the start of cart, address, payment and error states. It runs eight minutes.
- You post it in your team thread with this message: "Please reply by Thursday 09:00 UTC. Use the timestamp and one sentence, like '03:40, the back button is easy to miss'. Tag me on anything you think blocks launch."
- Berlin watches at the start of their day and replies with four timestamps. Austin watches later and adds two.
- At your next morning you read six replies in order, because each starts with a time in the video. You answer in the thread, and you re-record only the payment screen as "Checkout review 02" because that is the part that changed.
The fixed reply format is what makes this work. It makes the replies easy to scan and shows who has not replied yet.
Send the recording
After Stop and finish, the recording appears on the page with a player and is already saved in your folder. You have three ways to hand it over.
- The MP4 and the transcript. Upload the MP4 wherever your team keeps files and paste the link in chat. Paste the relevant transcript lines into your message if you want reviewers to skim first.
- Captions. Press Captions .srt on the card to download a caption file. It is made in the page and is not written to your folder, so download it while the recorder page is open.
- A publish page, on Creator and up. Tick Also save every source separately before recording. The recording's Separate sources folder then holds
publish.html, which shows a player, one chapter per marker and the transcript with times. It opens from the folder with nothing to host. Send the whole recording folder, not just the page, and note that you cannot add the page after recording if the option was not ticked. The client demo publish page guide has the details.
If you are also leaving for a while, the same structure works for a handover video before you go on leave.
Mistakes that cost a day
When a reply takes a day to come back, a bad recording costs two.
- No question. If you do not say what you need, you get "looks good".
- Skipping the test. A muted microphone found after twelve minutes is painful.
- Sharing the whole screen. Share one tab or window instead.
- One long recording for everything. Keep one flow or one decision per recording and number them in order.
- Not telling people. If other people speak or appear in the recording, tell them first. Recording calls may need everyone's agreement depending on where you and they are.
Frequently asked questions
How long should a recorded design review be?
Keep it to one flow or one decision per recording. Longer reviews are easier to answer as numbered recordings, such as Checkout review 01 and 02.
Can reviewers read the transcript instead of watching?
Yes, if Live transcript was on. The folder holds a plain-text transcript with the time of each line, and the card offers Transcript and Captions .srt while the recorder page is open.
Does the recording get uploaded to Cheap Recorder?
No. It is written to a folder you pick on your own computer. Convert and Download MP3 send the file to the server and delete it once the conversion is done. While the live transcript is on, Chrome sends your microphone audio to Google to turn it into text.
Can I do this on the free plan?
Yes. The free plan includes recording, live transcript and captions, and 12 hours of recording a month, with no card needed. The publish page needs Creator or above.
Can I add a chapter for each screen?
Press M or Add marker at the start of each part. Tick Also save every source separately first, because markers are saved to files only in that mode.
Get started
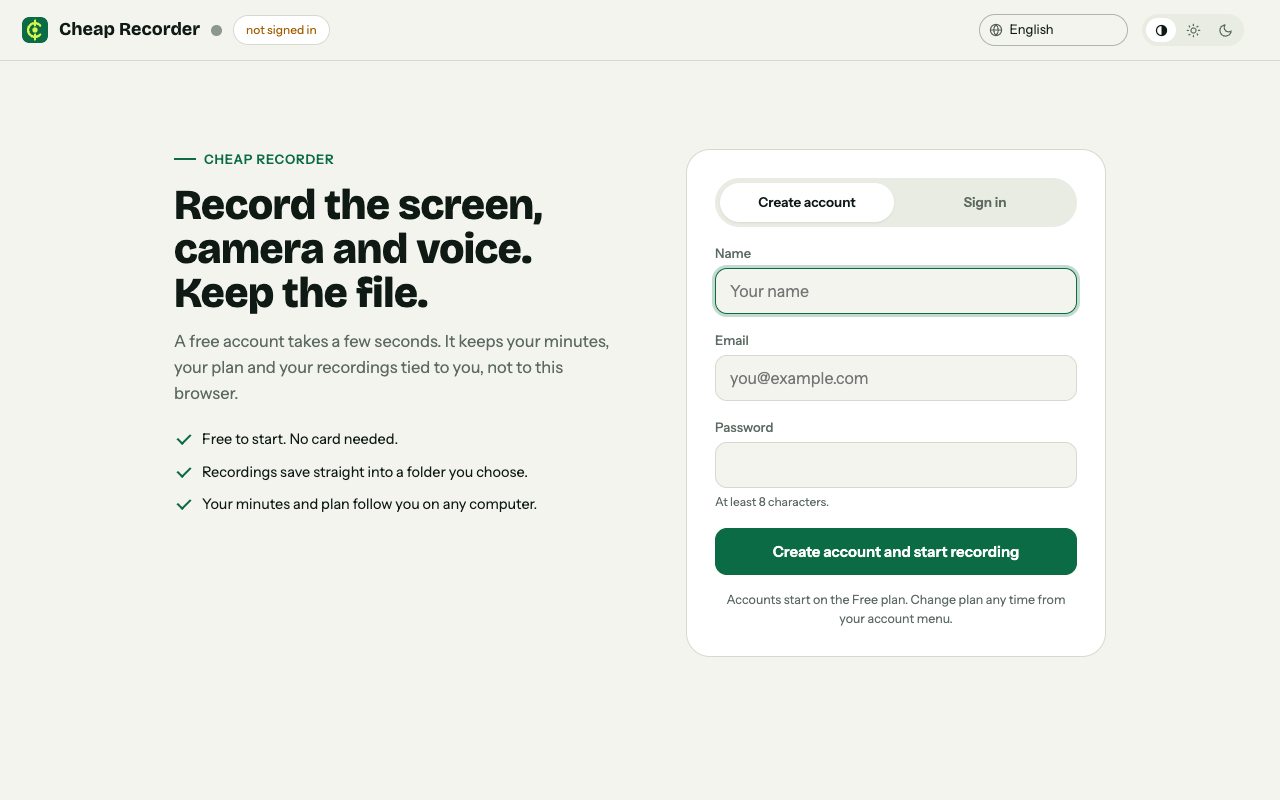
The free sign-up page: no card needed, and recordings save into a folder you choose.
Pick one design, write your three questions, record a 30-second test, then do the full walkthrough. Start recording in Chrome on the free plan; it needs no card and your recordings stay on your own disk.
Comments
No comments yet.
Sign in or make an account to comment.