How to Quiz Yourself on a Lab Manual Before a Lab
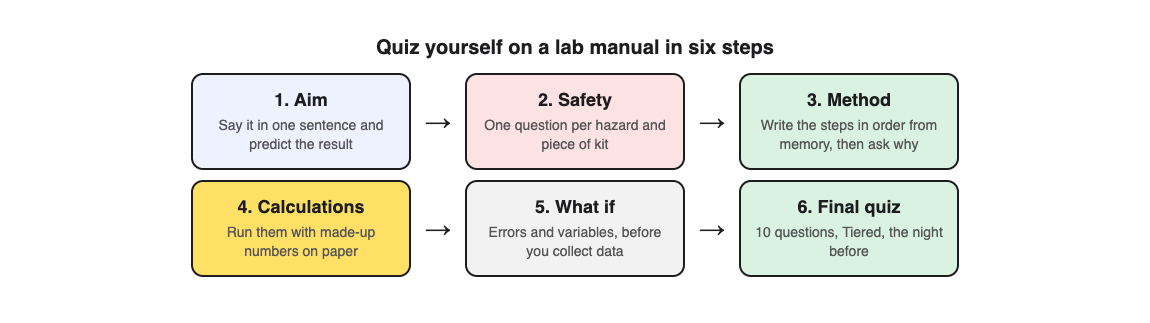
Most students read a lab manual once and walk into the lab hoping it sticks. It usually does not. If you want to know how to quiz yourself on a lab manual before a lab, the answer is simple: turn each part of the manual into questions, answer them from memory, and check yourself. This guide walks you through six steps. You can do them with a pen and paper, or by photographing the pages and letting Study Shot write the questions for you.
How to quiz yourself on a lab manual before a lab, and why
A lab manual is dense. It has an aim, a hazard list, an equipment list, a numbered method, a data table and a set of calculations. Reading it feels like learning, because every line makes sense while your eyes are on it. Then you stand at the bench, the page is wet or out of reach, and you cannot remember whether the indicator goes in before or after the acid.
Recall is different from recognition. In a classic 2006 study, students who tested themselves on prose passages remembered much more a week later than students who reread them, even though rereading made them feel more confident. Preparing in writing before a lab has support too: in a neuroanatomy course, students who wrote short pre-lab assignments scored higher on the final exam than an earlier group who did not, though the two groups were different years, so other things may have differed.
A wrong answer the night before costs you nothing; a wrong step at the bench can cost you the session.
Step 1: Skim the aim and predict the result
Start with the first paragraph of the manual. Read the aim and the background, then close the manual and write two things:
- What is this lab trying to find out, in one sentence?
- What result do you expect, and why?
Say the lab is about the rate of reaction between marble chips and hydrochloric acid at different temperatures. Your prediction might be: "Higher temperature, faster gas production, because particles collide more often and with more energy." Now you have a reason to watch the data. If your results disagree, you will notice.
If you want a quick check on the background theory, photograph the background page. In Study Shot, tap Make a new quiz, then Take photo. Hold the page flat and fill the frame. Choose the Basic level ("Key terms, facts and definitions") and 5 questions. That gives you a fast warm up on the vocabulary before you go deeper.
Step 2: Turn safety notes and equipment into quick questions
Safety notes are the part of a lab manual students skip most. They are also the part teachers check first. Turn each hazard into a question:
- Which chemical in this lab is corrosive, and what do you do if it touches your skin?
- Why do you wear goggles even when heating only water?
- Which piece of glassware measures volume most precisely: a beaker, a measuring cylinder or a burette?
Write the answers on the back of the page, then cover them and test yourself. Do the same with the equipment list. For each item, ask what it is for and what could go wrong if you used the wrong one.
If your manual has a labelled diagram of the setup, photograph it too; diagrams work as well as text.
Step 3: Quiz yourself on the method in order, from memory
This is the step that saves you in the lab. Cover the method and try to write the steps in order. Do not worry about exact wording. Focus on the sequence and the quantities.
Then uncover it and compare. Mark every step you missed or put in the wrong place. Those are the ones you quiz again.
A useful trick is to ask "why" for each step. "Why do we rinse the burette with the acid, not with water?" A step you understand is much easier to remember than a step you memorised. For the marble chip lab, you might ask: why do you start the stopwatch the moment the chips go in, and not when the bubbles start?
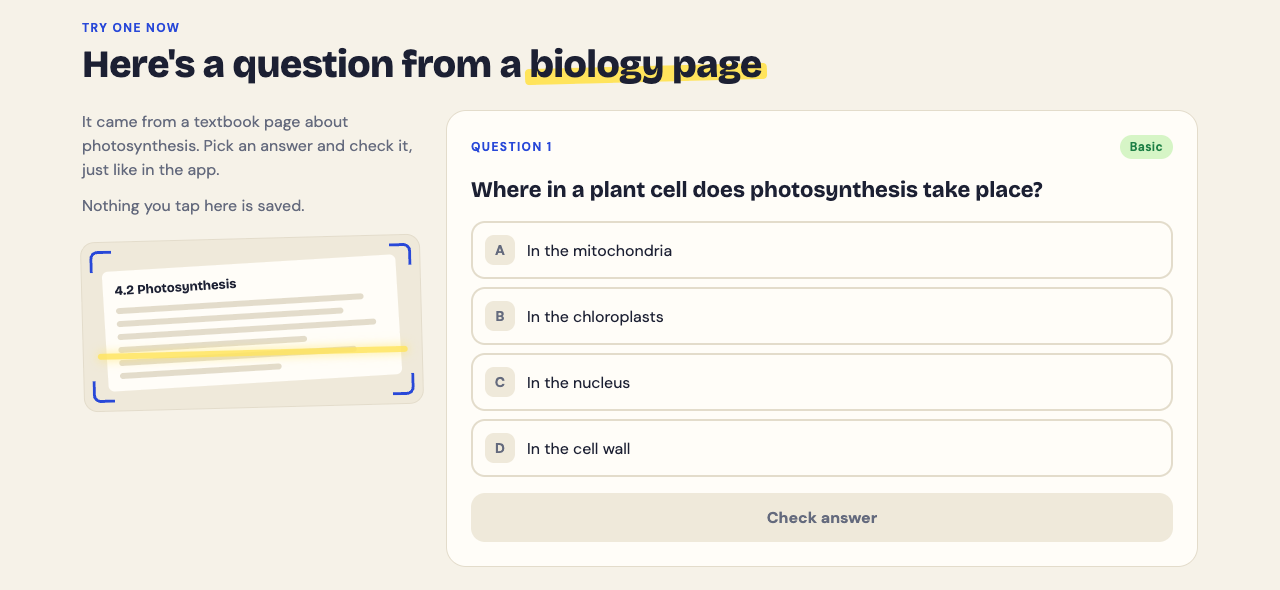
To get these "why" questions written for you, photograph the method page and choose the Intermediate level ("Explain, compare and connect ideas"). You answer one question at a time. Pick an option, press Check answer, and you see Correct! or Not quite., the right answer, and a short explanation. If you forget what the page said, tap Show page to see your photo during the quiz.
Step 4: Practice the calculations and data table before you start
Many students meet the calculation for the first time when the data is already on the table and the bell is about to ring. Do it the night before with made up numbers.
- Copy the empty data table from the manual.
- Fill it with sensible fake values. For the marble chip lab: 20 °C, 32 cm³ of gas in 60 seconds.
- Run the calculation the manual asks for. Here, rate = 32 ÷ 60 = 0.53 cm³ per second.
- Check your units and how many decimal places the manual wants.
Now you know what a reasonable answer looks like. In the lab, if you get 530 cm³ per second, you will know something went wrong before you hand it in.
Step 5: Write 'what if' questions about errors and variables
The analysis section of a lab report asks about errors, variables and improvements. You can prepare for it before you collect a single result. Write "what if" questions like these:
- What if the chips were smaller? Which variable would that change?
- What if gas escaped before you closed the stopper? Would your rate be too high or too low?
- Which variable are you changing, which are you measuring, and which must you keep the same?
In Study Shot, the Advanced level is built for this. It asks you to "Apply and predict in new situations." Photograph the method or analysis page, choose Advanced, and the questions will push you to predict what happens when something changes. One honest note: the questions are written by an AI model and can contain mistakes. Read the explanation to check the reasoning against your manual. If a question is wrong, use Report a problem with this question under it.
Step 6: Do a 10-minute final quiz the night before
The night before the lab, do one short final quiz that covers everything. In Study Shot, photograph the key page (usually the method), choose 10 questions and leave the level on Tiered. Tiered is the default. It is a ladder that starts with basic questions and climbs to advanced, splitting the questions as evenly as it can across the three levels.
When you finish, the results screen shows a percentage, a grade and a score for each level. That level score tells you where you are weak. If you got 3 of 3 on Basic but 1 of 3 on Advanced, you know the facts but not the reasoning. Go back to Step 5.
The Look at these again list shows each question you missed, with your answer and the right answer. Read those, then press Retake quiz. The quiz stays in your library with its page photo and your best score, so you can retake it on the bus the next morning too.
The same habit works across your other subjects. The steps are almost the same when you quiz yourself on a primary source for history class or quiz yourself on a novel for English class: photograph the page, answer from memory, and study what you missed.
If your lab partner is preparing too, use Share this quiz. It makes a link. Your partner needs a Study Shot account and gets their own copy of the questions, without your photo. You can stop sharing at any time.
Frequently asked questions
How long before a lab should I start quizzing myself?
Start two or three days before if you can. Do Steps 1 to 5 across those days, then do the 10-minute final quiz the night before. Spreading it out helps the method stick better than one long session.
What if my teacher gives a pre-lab quiz?
Then Steps 2 and 3 matter most, because pre-lab quizzes often focus on safety and the order of the method. Photograph those pages and run a quiz on each until your grade reads Mastered, which means 90% or higher.
Can I use flashcards for a lab manual?
Flashcards work well for equipment names, hazard symbols and definitions. They are weaker for method order and "what if" reasoning, so use them for Step 2 and use full questions for Steps 3 to 5.
How do I remember the steps of a long procedure?
Break it into chunks of three or four steps, such as setup, measuring, reacting and cleanup. Learn the purpose of each chunk, then quiz yourself on the order inside it. Asking "why" for each step makes the sequence much easier to recall.
One more limit: a multiple-choice quiz cannot check your calculation or your written analysis, so keep Steps 4 and 5 on paper. Your photo is sent to the AI model to write the questions and is kept on your own device, not stored on Study Shot's server.
Get started
Try Study Shot: it is free to start. Photograph the page you are studying tonight and get 10 practice questions on it, from basic to advanced.
Comments
No comments yet.
Sign in or make an account to comment.