How to write a case study about your own work
To write a case study about your own work, pick one project and explain it in four parts: the problem, your approach and the decisions in it, the result and where that result comes from, and the lesson. Report only what you saw or measured, and say plainly what you do not know. This guide walks through each part with one made-up example, then shows how to publish the finished piece as an article on your own page.
What a case study is, and why it beats a portfolio line
A case study about your own work is a short article about one project you did. It says what the situation was, what you tried, what you chose and why, and how it turned out.
A portfolio line tells a reader that you did something. A case study shows how you think. A line says "Rebuilt the volunteer sign-up form for a library." A case study shows where people gave up on the old form, what you cut, the feature you argued against, and what you saw afterwards. The second version gives a reader something to judge.
Here is the example used through this guide. Rosa (a made-up designer) spent a month helping a small library (also made up) fix its volunteer sign-up form. People kept starting the form and not finishing it. She rebuilt it, and now she wants to write it up. None of it is a real result; it only shows the method.
Choose the right project to write about
Not every project makes a good case study. Pick one that has three things:
- A clear problem. You can say in one sentence what was wrong at the start. "Volunteers were giving up halfway through the form" works. "We improved things" does not.
- A real decision. At some point you had two or more options and chose one. The decisions are what make the piece worth reading.
- Something you can show. A before and after, a quote from feedback, a count, an old draft. If you have nothing at all to point to, the piece will be thin.
Pick the project closest to the work you want to do next. If you want more research work, write up a research project, even if another project looks better in pictures.
Gather your notes, numbers, drafts and feedback
Collect everything before you write a sentence, because the detail you need is in your records, not in your memory. Go through:
- Notes and messages. Emails, chats, meeting notes. Look for the moment the problem was first named and the moments decisions were made.
- Numbers. Anything you counted. Write down where each number came from and the period it covers.
- Drafts and dead ends. Old versions, sketches, the approach you dropped.
- Feedback. What the client, users or colleagues said. Copy their words exactly so you can quote them fairly, and ask before you quote anyone by name.
For Rosa, the pile is the old five-page form, a staff email saying "we get lots of half-finished entries", her first sketch with a progress bar, the final one-page form, and her notes from watching three people fill in each version.
Put it all in one place and give each item a short label: what it is and what it shows.
How to write a case study in four parts
Use four sections, in this order. Each one answers a question a reader brings with them.
- Problem. What was wrong, who it affected, and why it mattered. A few short paragraphs.
- Approach. What you did, in the order you did it, with the key decisions and the reasons behind them.
- Result. What changed, using the best evidence you have, with its source.
- Lesson. What you would keep, what you would change, and what you still do not know.
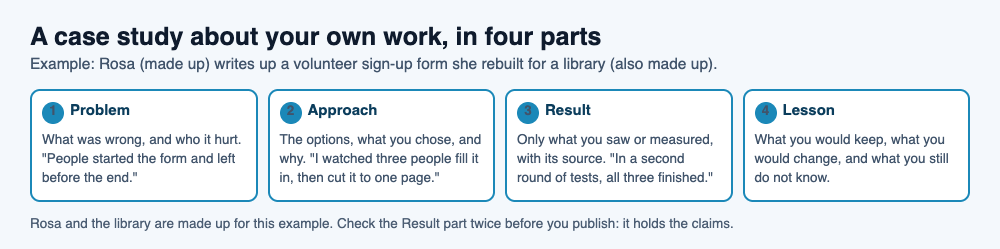
The four parts, filled in for Rosa's made-up form project.
Rosa's outline looks like this:
- Problem: volunteers started the form and left before the end, and staff chased them by phone.
- Approach: watched three people fill it in, saw each one stop at the availability grid, cut the form to one page, and moved availability to a follow-up email.
- Result: in a second round of tests, all three people finished the new form.
- Lesson: watch real people before redesigning; the hardest question does not have to be on the first form.
Write the outline before the prose. If a part is empty, go back to your records before you write.
Open with the outcome, not the backstory
Your first paragraph should say what the project was, what changed, and what the rest of the piece covers. Skip the warm-up.
A slow opening: "I have always been interested in how people use forms, and last spring I had a chance to explore this further."
A direct one: "The library's volunteer form was losing people on its third page. I cut it to one page and moved the hardest question to a follow-up email. Here is how I found the problem, the feature I argued against, and what I saw afterwards."
The second tells the reader exactly what they will get. How to write an article introduction that gets to the point covers this move in more depth.
Show your decisions, including the ones that did not work
A reader can see the finished product in a screenshot. What they cannot see is why it looks that way, so spend your words there.
For each key decision, write three things:
- The options. "I could add a progress bar, split the form into smaller steps, or cut questions."
- What you chose. "I cut questions."
- Why. "In all three tests, people stopped at the availability grid, not at the length. A progress bar would not fix a question people did not want to answer yet."
Include at least one idea you dropped. For Rosa, the progress bar sketch is worth a paragraph: it looked like the obvious fix, and watching people showed it was the wrong one.
Name the disagreements too. If the staff wanted to keep the availability grid and Rosa pushed back, she says so, says how it was settled, and gives the staff's reason in its strongest form.
Report the result honestly, even without hard numbers
Many projects end without clean numbers. That is fine. Inventing precision you do not have is not.
Use the strongest honest evidence you have, and label each kind:
- Counts you measured. Give the period and the source, for example "the four weeks before and after, from the form's own list of entries".
- Change someone reported. Quote them and say who they are, with their permission.
- What you observed. "In a second round of tests, all three people finished the form."
- What you do not know. "I do not know whether more volunteers turned up for shifts."
That last line matters. It tells the reader where your claim stops, so they can trust the parts you did state.
Frequently asked questions
Can I write a case study if the project failed?
Yes. Keep the same four parts, be specific about what went wrong, and give the lesson part more room.
Do I need permission to publish a case study?
If the project involved a client, an employer or private data, ask first and follow any agreement you signed. If the answer is no, you may be able to write it with names and identifying details removed, and you should tell readers you have done so.
Should I write it in the first person?
Yes. It is your work, and "I chose" is clearer than "it was decided". Use "we" only where others did the work with you, and name their part.
Can I change a case study after I publish it?
Yes. On Electrified a published post can be changed and saved again, or unpublished back to a draft, and it keeps its address. Say in the article what you changed if the result itself changed.
Get started
On Electrified, an article has a title and as many sections as it needs, and each section starts with ## and a heading. So Rosa's outline maps straight onto the page: ## Problem, ## Approach, ## Result, ## Lesson. The editor reads bold, italic, links, lists, quotes and inline code, and the Preview tab shows how the published page will look.
- Make an account. You get your own page at
/@handle, where your notes and articles live. - Open the editor, choose Article, and paste in your outline as
##sections. - Press Save draft. Only you can see a draft, and no search engine sees it, so you can come back to it over several days or show it to the client first.
- Add up to 5 topics, separated by commas, such as
case study, forms, design. Each topic links to a page of every post about it. - Read it in Preview, check every number against its source, then press Publish.
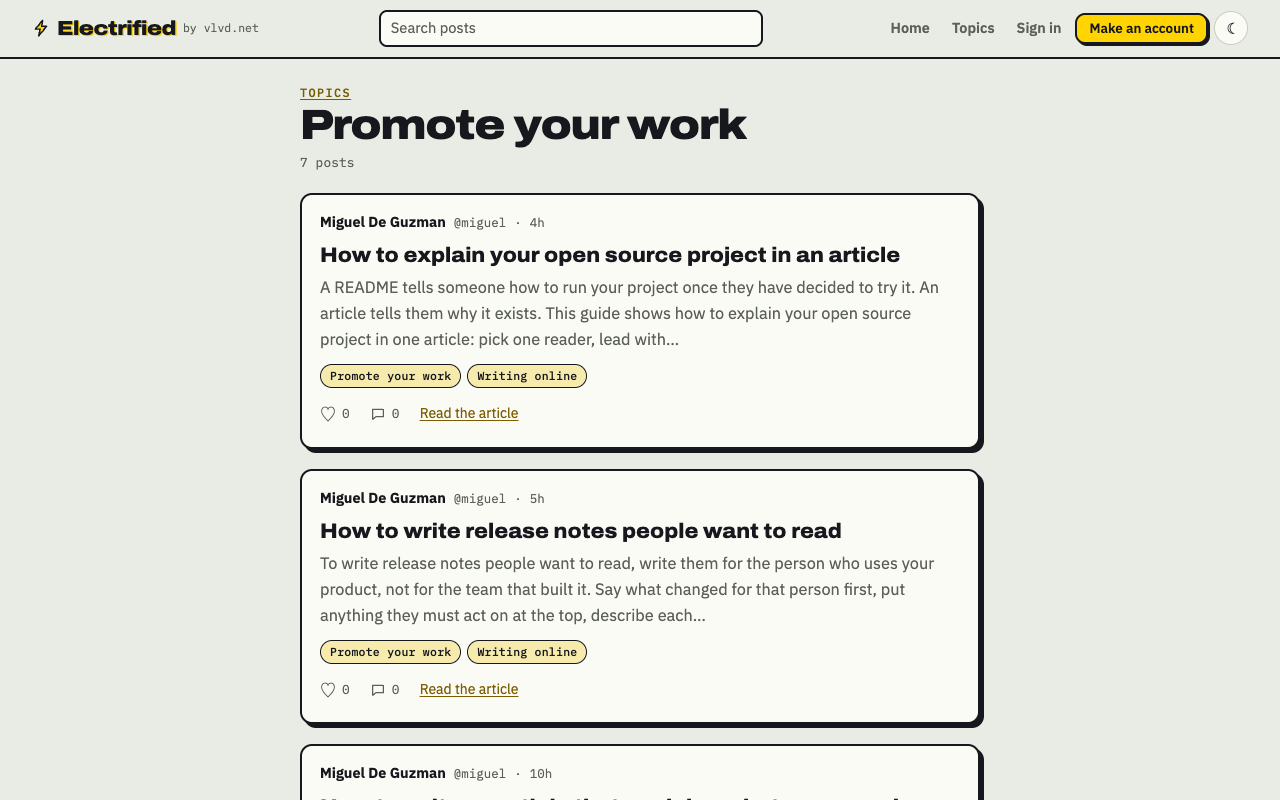
A topic page on Electrified lists every post filed under that topic.
If you draft with a writing assistant, a personal token from Settings lets it save and edit drafts in your account, but it cannot publish, so the final read and the Publish press are yours. Your page has its own feed at /@handle/feed.xml, so people who choose to follow your work can see each new case study. For more on explaining your own work, see how to explain your open source project in an article and the Promote your work topic.
Make an account on Electrified: write about your product, topic or idea on your own page, one article at a time, and let readers follow along.
Comments
No comments yet.
Sign in or make an account to comment.