Makerspace tool problems: fixes members can borrow
If you run or use a shared workshop, you already know the pattern. A tool fails, someone puts a note on it, and three weeks later a different member hits the same fault. This post is about makerspace tool problems, the fixes members can borrow, and how to keep a record that lets the next person start from what already happened instead of from zero.
The tools here are examples. The method is what matters: write the problem in one line, record each fix you try, and mark what happened.
Why makerspace tools keep breaking in the same ways
On shared equipment, many members use the machine and no one person carries its history. That gap makes repeat faults easy.
Three things tend to happen:
- A member can fix a fault and not write down what they did.
- A member can try a fix that fails and tell nobody, so the next member tries it again.
- Notes live on paper tags, chat threads and memory, so nobody can see the whole picture.
The second one costs the most. A fix that failed is useful information, and a log that only holds what worked leaves it out.
The most common makerspace tool problems
You do not need a perfect taxonomy. Group faults by what you see, not by what you think caused them. A symptom is something a member can observe and describe in a line.
- A 3D printer prints with stringing, or the first layer will not stick.
- A laser cutter cuts unevenly or leaves scorch marks.
- A table saw blade burns the wood.
- A drill press wobbles.
- A soldering iron will not hold temperature.
- A vacuum or dust collector loses suction.
Each of those is a problem you can write in one line. Each can have several possible causes, and each cause suggests a different fix. That is why a flat checklist is not enough. You want to see the problem, the fixes attempted, and the results side by side.
3D printer and laser cutter fixes members can borrow
Take a first layer that will not stick on a shared printer. Here is how a made-up entry might look. The fixes are examples of what a member might try, not advice for your machine.
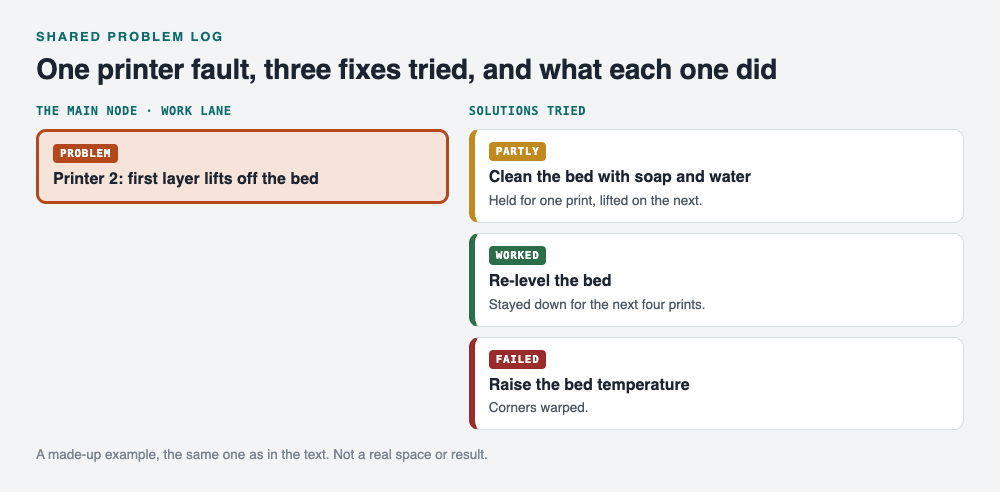
Problem: Printer 2, first layer lifts off the bed.
- Idea: Clean the bed with soap and water. Outcome: partly. Held for one print, lifted on the next.
- Idea: Re-level the bed. Outcome: worked. Stayed down for the next four prints.
- Idea: Raise the bed temperature. Outcome: failed. Caused warping at the corners.
The next member who sees lifting on that machine now knows to level first. They also know not to raise the temperature. The failed entry saves them a wasted print.
The same shape works for a laser cutter that scorches edges. Members might try cleaning the lens, adjusting focus, changing speed and power, or checking the air assist. Record each idea with its outcome, and follow your space's rules and the machine's manual for what a member may touch. Over time you see which fix belongs to which symptom.
Woodshop and metalworking tool problems
Heavy tools need more care, and some repairs should go to a staff member or a qualified person. Use the log for what members can safely check and report, and mark anything that needs staff as exactly that.
A table saw that burns the wood is a good example, again made up:
- Idea: Swap in a sharp blade. Outcome: worked.
- Idea: Clean pitch off the current blade. Outcome: partly. Burning reduced but not gone.
- Idea: Feed the wood faster. Outcome: partly. Helped on softwood, not on hardwood.
Notice the detail in the last line. A partial result with a condition attached is worth more than a plain pass or fail. It tells the next person when the fix applies.
If two faults on different tools seem to share a cause, link them. Problem Graph lets you link problems even across lanes, and its home page says patterns show up on the map that never show up in a list.
How to test one fix at a time on shared equipment
When several people work on a machine, it is tempting to change three things at once. Then nobody knows which change helped. The rule is simple: change one thing, test, record, then change the next.
On shared equipment this matters more, because another member may run a job between your tests. Write down the condition each time: material, settings, who used it last. The post on testing fixes one change at a time covers the method in detail.
Before you commit to a single theory, it also helps to hold a few candidate fixes open. The post on set-based thinking explains how to keep several options alive and cut them with evidence.
A practical sequence for a faulty machine:
- Write the problem in one line.
- List two or three candidate fixes as ideas.
- Mark one as the fix you are trying.
- Run the test and record the outcome: worked, partly, or failed.
- Move to the next idea only if the first did not solve it.
Build a shared problem log members will actually use
A log fails when it takes effort. Keep entries short. One line for the problem is enough, and a fix can be a few words.
Problem Graph can hold this kind of log. You write the problem, attach the solutions you try, and mark each as worked, partly or failed. You can mark one problem as a main node, such as "Printer 2 first layer", and share it into a private network. You create the network, give members the invite code, and they see the problem with its solutions, outcomes and requirements. Nobody outside the network sees it. Keep in mind that anyone who has the invite code can join, so hand it out with care.
Some habits that help a space:
- Use one main node per machine or per recurring fault.
- Record failed fixes as carefully as successful ones. The graph keeps a failed solution on the map, and that is what the next member needs to know.
- Link related faults, for example two printers with the same bed problem.
- Note materials and settings in the idea itself.
If you want to see how other groups handle a shared list, the post on group project problems for students shows the same idea in another setting. For a pair working on one list, see cofounder problems.
Problem Graph can also show similar problems other people have shared, and which of their solutions worked. You can borrow one into your own graph with one tap, and it keeps a link back to its source. This describes how the feature works. The public network may have little in it, so do not count on finding a match for your tool today. There is also an option to ask for AI suggestions, which are proposals to test, not confirmed answers.
Frequently asked questions
What are the most common makerspace tool problems?
Print adhesion and stringing on 3D printers, uneven cuts on laser cutters, burning on saws, wobble on drill presses, and weak suction on dust collection. Write each as a one-line symptom so members can match it quickly.
Should members fix shared tools themselves?
Only for checks that are safe and within what your space allows. Log anything beyond that and mark it for staff, so the fault is recorded and nobody works around it.
Why record fixes that failed?
A failed fix tells the next member what not to waste time on. In Problem Graph, a failed solution stays on the map with its outcome.
Can I keep the log private to my makerspace?
Yes. Create a private network, share a main node into it, and give members the invite code. Members see it and nobody else does, though anyone with the code can join.
Get started
Pick the one machine that breaks most often. Write its main fault in a line, add the fixes people have already tried, and mark what happened to each. Then share it into a private network so members can see it.
Try Problem Graph: it is free, and you can look around the public network without an account. Write one problem down in a line and attach the first thing you will try.
If you also want to see the method applied to another subject, the post on logging what you tried and what worked is a good next read.
Comments
No comments yet.
Sign in or make an account to comment.