Record a product walkthrough for a new teammate
A live tour helps one person once. If you record a product walkthrough for a new teammate, they can watch it on day one, pause it, and come back to it in week three. This post shows how to cut the tour into a few short recordings, one job each, and how to record them in Chrome with Cheap Recorder. It ends with a worked example you can copy.
Why a product walkthrough for a new teammate works better recorded
A live tour depends on calendars and on what you remember that day. You skip the refund screen because time is short, and the new person finds out in month two.
A recording changes three things:
- Everyone gets the same tour. The next hire sees what this one saw.
- They can rewatch it. Replaying the one confusing screen costs them nothing, and they do not have to ask.
- You record once. It takes one session, then you send a folder.
It does not replace people. Use the video for "what is this and where is it", and keep your live time for questions.
Split the tour into jobs, not features
Do not tour the whole product. Ask what this person must do in their first two weeks. A support hire needs the customer's view and the admin screens. An engineer needs the main flow as a user sees it.
Write three to five jobs. Each is one recording. For example:
- Open a customer account and see what the customer sees.
- Find an order and read its history.
- Issue a refund.
- Know where to ask when something looks wrong.
Short videos are easier to redo than one long one. When the refund screen changes, you replace one file and leave the rest alone. The same idea runs through recording a course lesson by lesson, which goes deeper on keeping a set of videos matching.
Write a short outline for each job
You do not need a word for word script. You need a few lines you can glance at. For each job, write:
- The goal in one sentence: "By the end you can issue a refund."
- The screens you will click through, in order.
- The one thing that trips people up.
- Who to ask when it goes wrong.
Then add a checklist for the recording itself. Everything on the shared screen ends up in the file, so this part matters most:
- Sign in to a demo account, not your own, and use test data with no real customer names.
- Share one window or one browser tab, not the whole screen. That keeps your other tabs, apps and private things out of the recording.
- Close what you do not need, and silence notifications.
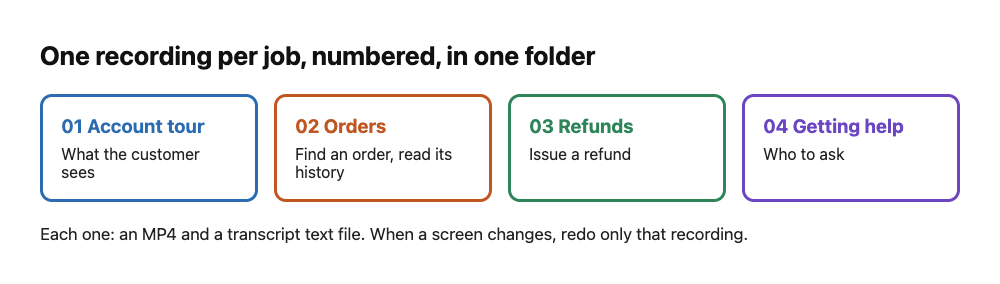
One recording per job, numbered so they stay in order.
Set up Chrome and the recorder
Cheap Recorder runs in Google Chrome on macOS, Windows and Linux, with nothing to install. Open the recorder and set it up in this order.
Choose a folder and name the recording
Press Choose folder... under Where to save. Chrome asks whether the page may edit files in that folder; allow it. The recorder does not remember the folder between visits, so you pick it again each time. Until you do, Start recording stays greyed out and the note beside it says to choose a folder first. The guide on where recordings are saved has the details.
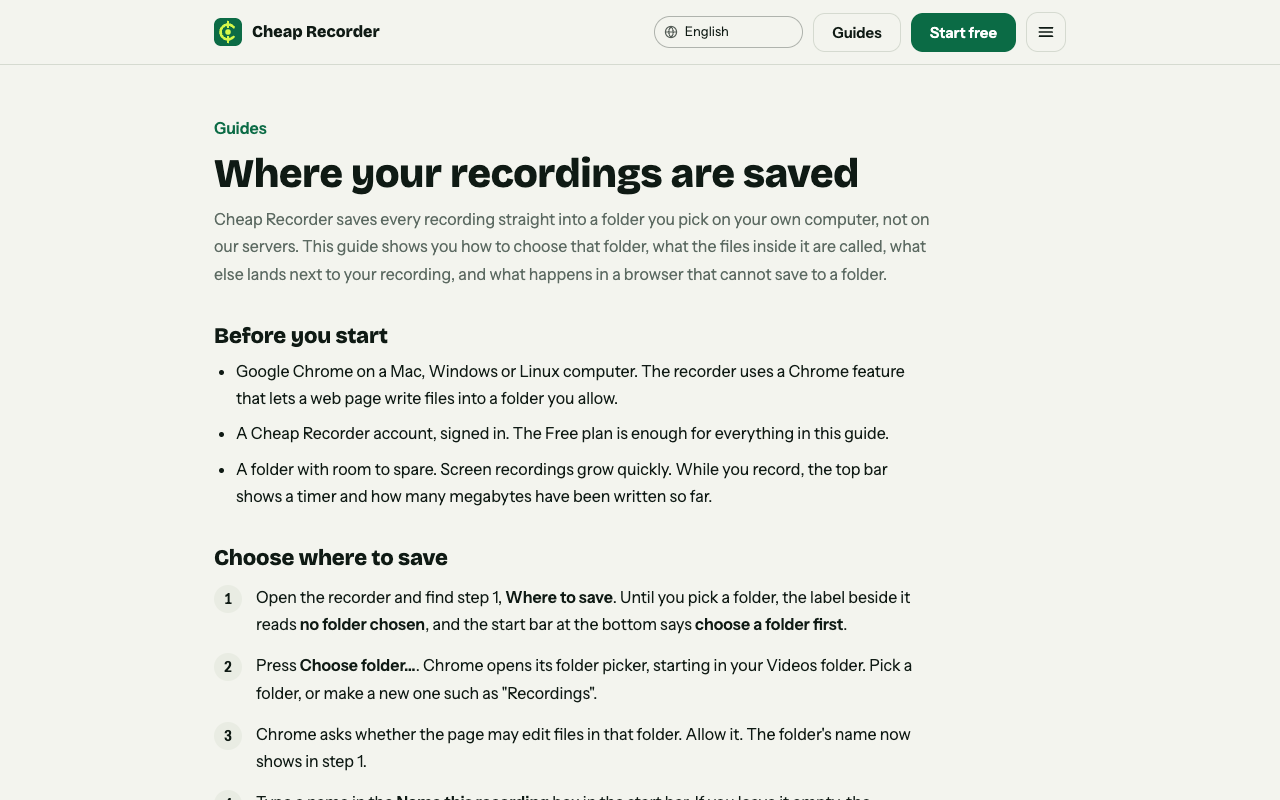
The guide on where recordings are saved.
Then fill in Name this recording. The name becomes the file name and the folder name, with the date and time added to the folder. Numbers keep takes in order, so use names like Onboarding 01 Account tour and Onboarding 02 Orders. The post on naming screen recordings goes further.
Pick what to capture
Under What to capture choose A window or A browser tab. Chrome opens its own sharing box; pick the one tab where the product lives and press Share.
Camera and microphone
Allow the microphone, and the camera if you want it on screen. The Record my webcam switch is yours to decide. A face in the corner can make a tour feel friendlier; switch it off and the file holds the screen alone. If you keep it, the default layout is picture in picture, bottom right. Drag the camera away from the part of the product people need to read, and use the Size slider (12% to 50% of the picture's width). The preview is the recording, so what you see is what the file holds. The screen and webcam guide covers the other layouts.
Two options to check
- Live transcript is ticked by default. Check the language menu before each recording, because it goes back to its default every time the page opens. While it is on, Chrome sends your microphone audio to Google to turn it into text.
- Also save every source separately is worth ticking if you want chapters from your markers or a publish page. It cannot be added after the recording.
Record each job, step by step
Start every session with a 30-second test. Say your name, click around, stop, and play it back. This catches a wrong microphone or a muted tab before you spend ten minutes on the real take. The post on a practice run before a client demo uses the same habit.
Then, for each job:
- Press Start recording. If it is greyed out, read the note beside it and fix what it says.
- Say the goal first: "This is the refund. By the end you will know where it lives and what the customer is told."
- Say what you are about to click before you click it, and go slower than feels natural.
- Press M, or Add marker, when you move to a new screen. A short note confirms the time.
- Say the trap and who to ask, then stop.
- Press Stop and finish. Chrome's own Stop sharing bar also ends the recording, but use Stop and finish.
If you slip, say "let me redo that part" and carry on. A false start is easier to live with than a restart, and the transcript shows where it was.
A worked example: four recordings for a support hire
Priya joins the support team on Monday. Her lead, Sam, records four jobs on Friday afternoon, using a demo account called "Acme Test".
Sam sets the folder once and names each recording Support 01 Account tour, Support 02 Orders, Support 03 Refunds and Support 04 Getting help. Before the first take Sam records 30 seconds and plays it back to check the sound. Each job takes about five minutes. In the refund video Sam presses M at the order page, the refund button and the confirmation message, and says the trap out loud: "Partial refunds are easy to mistake for full ones, so read the amount twice."
The folder holds four numbered recordings, each with an MP4 and a plain text transcript with times. That is the onboarding set. Priya watches them in order on Monday and searches the transcript text later when she half remembers where something was. Sam, Priya and Acme Test are made up.
What the new teammate gets, and how to share it
Each recording is an ordinary MP4 in its own folder, with a transcript text file beside it. It is plain text with times, and it opens in any text editor. If you rename the Speaker boxes in the Transcript fold and press Save captions, each line starts with the name. A Captions .srt file comes only from the card, and it is not saved in the folder, so download it before you close the page if you want it. The live transcript and captions guide explains both.
Two ways to hand it over:
- Send the MP4. The simplest way. Convert makes other formats, and Convert and Download MP3 send the file to the Cheap Recorder server, which deletes its copy when it finishes. The original in your folder is never changed.
- Send a publish page. On Creator and up, tick Also save every source separately before recording and the Separate sources folder gets a
publish.htmlwith a player, your markers as chapters and the transcript. It opens from the folder, so zip and send the whole folder. Zip a screen recording folder so the demo page opens shows how, and the publish page guide has the rest.
Keep the walkthrough current
Products change. Because each job is its own recording, you only redo the one that changed. Record a new take called Support 03 Refunds v2 and replace the old file. Put a date in your onboarding notes so someone checks the set each quarter.
Frequently asked questions
How long should a product walkthrough for a new teammate be?
Aim for one job per video, about five minutes. Several short recordings are easier to update and to find than one long one.
Do I need to install anything?
No. Cheap Recorder runs in Google Chrome on macOS, Windows and Linux. You choose a folder, and the recording is written there as you go.
Can I show only my voice and the screen?
Yes. Switch off Record my webcam and share a window or tab. The file holds the screen and your voice.
Does the free plan work for this?
Yes. It includes recording, live transcript and captions, and 12 hours of recording a month on one device, with no card needed. Green screen, layouts and the publish page need Creator or above.
Is the recording uploaded?
It is saved to the folder you pick on your computer. Only Convert and Download MP3 send the file to the server, and while the live transcript is on, Chrome sends your microphone audio to Google to make the text. Tell people you are recording.
Get started
Write three jobs, number the names, record a 30-second test, then record the real thing. The free plan needs no card: start recording in Chrome, and your recordings stay on your own computer.
Comments
No comments yet.
Sign in or make an account to comment.