Picture in picture screen recording: place and size your webcam
A picture in picture screen recording puts your face in a small box over your screen, the way most tutorials and demos look. The hard part is not turning the camera on. It is putting the camera where it covers nothing important, at a size that suits the video, and moving it when the screen changes. This guide shows how to do all three in Cheap Recorder in Chrome, with a worked example of a demo where the camera moves halfway through.
One note on plans first. The Creator plan lists green screen and layouts among its features. To see which layouts your account has, open your name in the top right and look under What you can do on this plan, where Screen and camera layouts is listed.
How picture in picture screen recording works here
In the Preview heading there is a Layout menu with four choices: Picture in picture, bottom right (the default), Side by side, Screen only and Camera only. Picture in picture is the one where the camera floats over the screen and you can move it.
The most useful thing to know is that the preview is the recording. Where the camera sits in the Preview box, and how big it is, is exactly what the file holds. There is no separate step to arrange it afterwards, and no editing software to fix it later. What you see is what you get.
The camera is never stretched, either. If its shape does not match its box, it is trimmed evenly from both sides, so a face in the middle stays in the middle.
Set it up in five steps
- Under What to capture, choose Whole screen, A window or A browser tab, then pick it in Chrome's sharing box and press Share. Until you pick one, the preview shows only the camera.
- Check that Record my webcam is on. Your camera now sits over the screen in the Preview.
- In the Layout menu, choose Picture in picture, bottom right.
- Drag the camera to the corner you want, and set its size (both are covered below).
- Type a name into Name this recording and press Start recording.
If you want a softer look behind you, the Background choices sit right under the camera switch. None and Blur are on every plan, and the post on blurring your background walks through it.
Where to put the camera
The rule is simple: put the camera in the corner your content does not use. That corner changes with what you film.
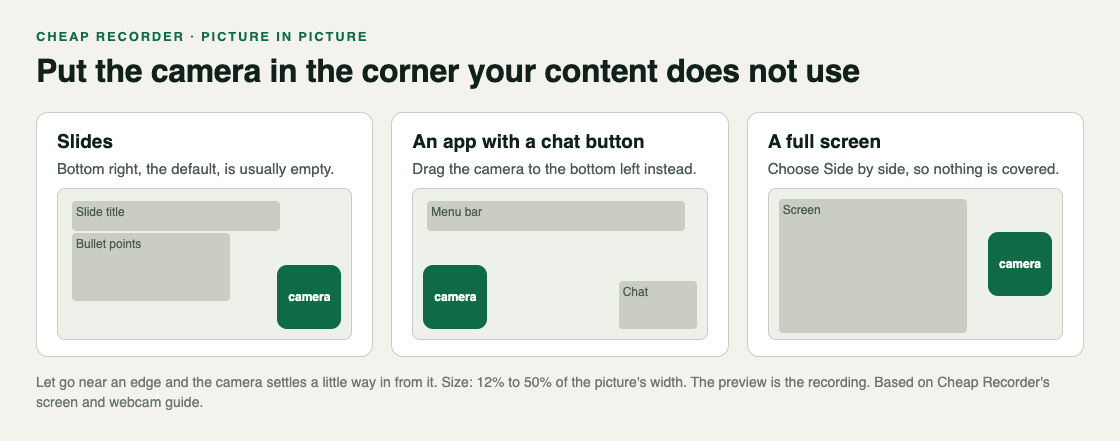
- Slides. Titles and text usually start at the top left, so the default bottom right corner is often empty. Leave it there.
- A web app or a tool. Many apps keep a button or a chat box in the bottom right. Drag the camera to the bottom left, or the top right if the menu is on the left.
- A screen that is full edge to edge. A spreadsheet, a code editor or a busy dashboard may have no free corner at all. That is when Side by side is the better layout (see below).
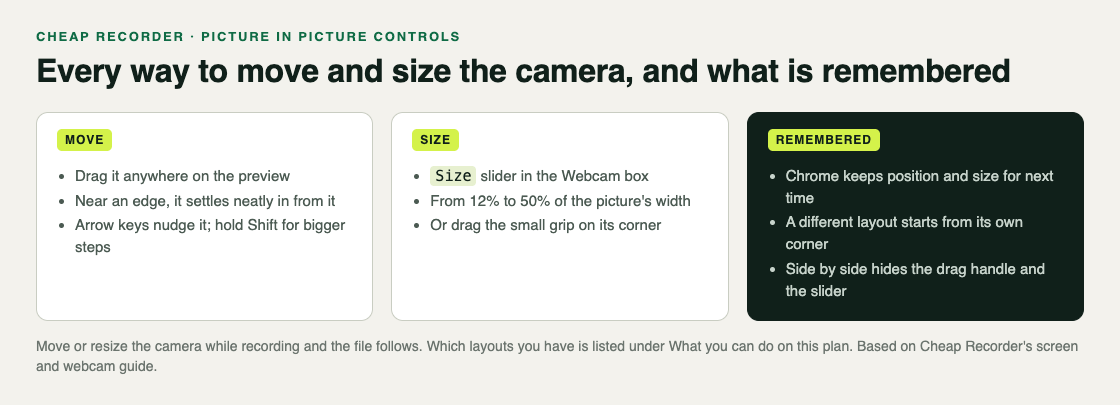
To move it, drag the camera to any spot. If you let go close to an edge, it settles a little way in from that edge, so it lines up neatly instead of touching the border. When the camera has keyboard focus, the arrow keys nudge it, and holding Shift moves it in bigger steps. That makes small, even adjustments easy.
Before you start, do one pass over your screen. Anything on a shared screen ends up in the file, and a camera box only hides what is under it. Sharing a single window or tab keeps the rest out of shot.
How big to make the camera
The Size slider in the Webcam box sets the camera from 12% to 50% of the width of the picture. You can also drag the small grip on the camera's corner.
Some rough guidance, which you should test on your own screen:
- Small, near 12%, when the screen is the star: a detailed walkthrough where viewers need to read small text.
- Medium for most tutorials, where your face adds warmth but the screen carries the lesson.
- Large, toward 50%, for an introduction or a wrap-up where you are talking to the viewer and the screen is a backdrop.
Chrome keeps the camera's position and size for next time. For a course, that means every lesson matches without you setting it again. Picking a different layout starts the camera from that layout's own corner again, so set it once and leave the layout alone between lessons.
Move the camera during a recording: a worked example
Because the file follows the preview, you can move or resize the camera while you record, and the video shows the move. Here is how that helps.
Say you are recording a five-minute demo of a web app for a client. The app has a help chat button in the bottom right corner, and halfway through you need to show it.
- You pick the app's browser tab under What to capture, so other tabs stay private.
- You leave the camera at bottom right and set the Size slider to about a quarter of the width. For the first half, you show the menus along the top, and the corner is empty.
- You press Start recording and talk through the menus.
- When you reach the chat button, you drag the camera to the bottom left. It settles neatly in from the edge. The chat button is now in clear view.
- For the closing summary, you drag the corner grip to make the camera bigger, since you are talking to the client rather than showing the screen.
- You press Stop and finish. The MP4 is in your folder, and the camera moves in the video exactly as it did in the preview.
Practise the move once before the real take. A quick, deliberate drag looks intentional. A slow wander around the screen does not.
When Side by side is the better choice
In Side by side, the screen takes the left part of the picture and the camera has a fixed place on the right. Nothing on the screen is covered. The drag handle and the Size slider are hidden, because the camera does not move in this layout.
Choose it when your screen has no free corner, or when every part of it matters. The other two layouts cover the remaining cases: Screen only drops the camera, and Camera only shows just you. If you want to record yourself with no screen shared at all, Webcam only sits beside the screen choices; the post on recording your webcam alone covers it.
When the camera does not behave
The camera is not in the preview. Make sure the layout is not Screen only, and that you have picked a screen, window or tab.
The webcam box says no camera found. Check that no other app, such as a video call, is using the camera, and that Chrome may use it in your computer's privacy settings. Then turn Record my webcam off and on again.
The camera jumped back to a corner. You picked a different layout, which starts the camera from that layout's own corner. Drag it back once and Chrome remembers it.
The screen and webcam guide lists every control, and the post on recording a tutorial with webcam and screen covers the rest of a lesson setup.
Frequently asked questions
How do I move my webcam in a screen recording?
In picture in picture, drag the camera anywhere on the preview, or nudge it with the arrow keys when it has keyboard focus. Hold Shift for bigger steps.
How big can the webcam be?
The Size slider sets it from 12% to 50% of the picture's width. You can also drag the grip on the camera's corner.
Can I move the camera while recording?
Yes. The preview is the recording, so if you move or resize the camera during a take, the file follows.
Why can I not drag the camera in Side by side?
In Side by side the camera has a fixed place on the right, so the drag handle and the Size slider are hidden.
Get started
The free plan needs no card. Try Cheap Recorder in Chrome, put your camera where it covers nothing, and your recordings stay on your own disk.
Comments
No comments yet.
Sign in or make an account to comment.